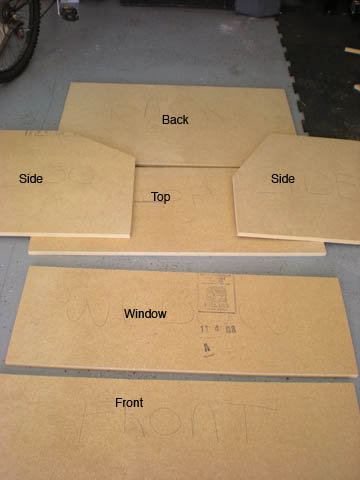
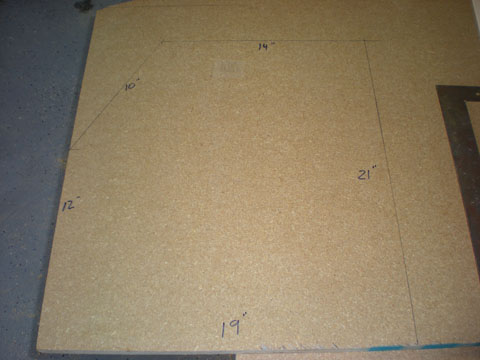
Step 1. Cut your pieces. I used 3/4 inch particle board. You can use MDF or plywood or what ever your wallet can afford at the time. The actual dimensions are posted at the bottom of this page.
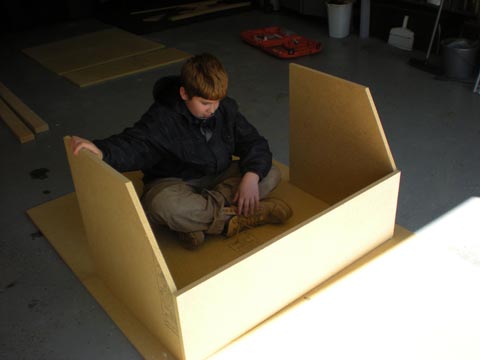
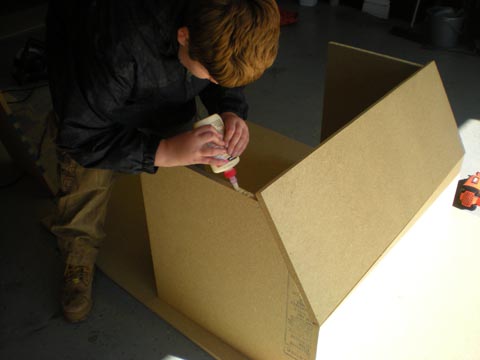
Step 2. Assemble the pieces. I have a helper here as you can see. I used a Pasload finish nailer and wood glue. I can't stress enough the importance of wood glue. You could use some type of finish nails or wood screws if you wanted. If you use finish nails make sure they are at least 1 1/2 inches long.
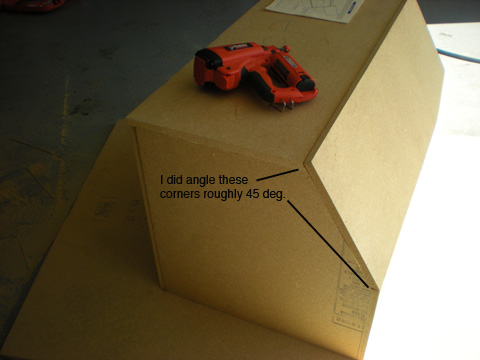
Step 3 You do not have to, but I cut these angles to give it a more aesthetic look. It left the overall dimensions of the pieces, I just cut off the edge so the pieces would fit together better. Again, this step is not critical.
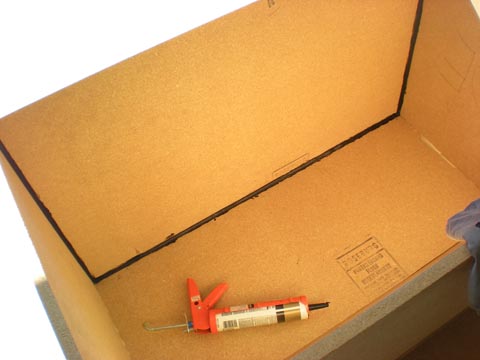
Step 4. Ensure you seal the inside of the box well. I used a silicon based caulk, but any door and window sealer should work. Make sure you caulk ALL sides and edges!
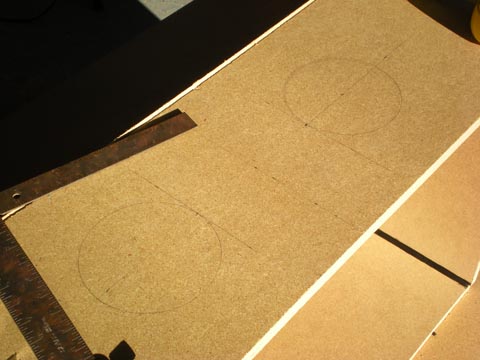
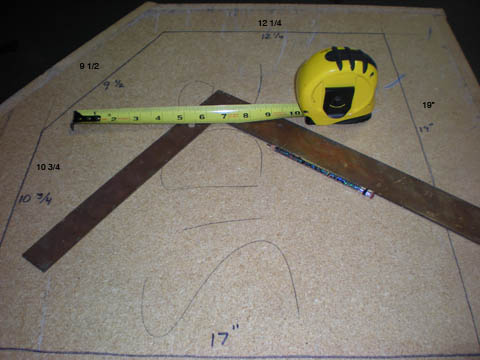
Step 5. Measure and cut your holes for the gloves. I made mine exactly 6" and they are separated by 7" on the inside of the circles.
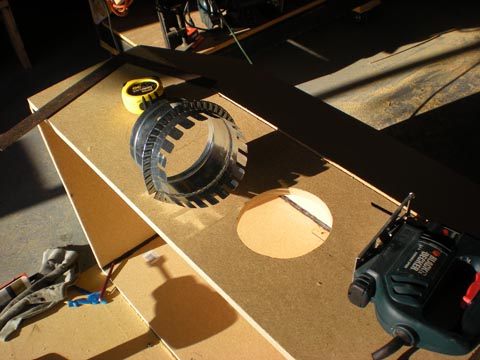
I found these vent flanges at Home depot today, they cost $3.50 a piece. Other than the wood, that's all I have into this thing so far. I'm not sure how or if these things will work but I'm sure I'll figure something out.... we'll see.
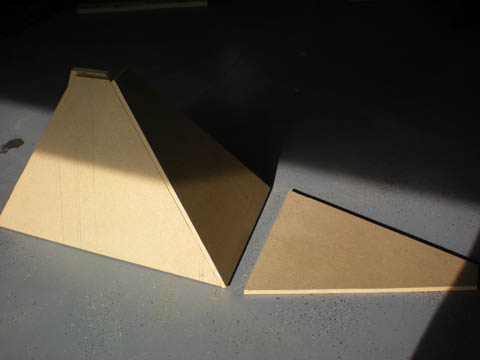
Step 6. After cutting the hopper pieces out, I glued and nailed them together. You may need help for it's pretty tricky balancing the individual pieces, lining them up and nailing them before they fall.
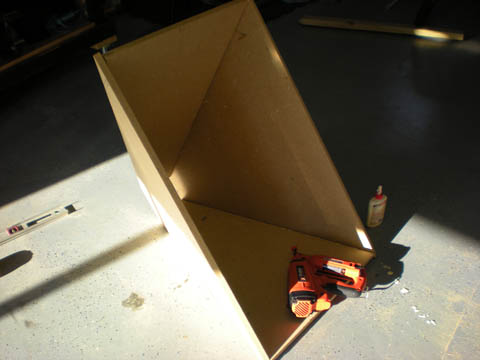
Here is the assembled hopper sitting and drying...... whew....... Oh, and don't forget to seal the inside seams of the hopper also!
Step 7. Time to cut the door opening. Pretty easy, just use the dimensions shown above.
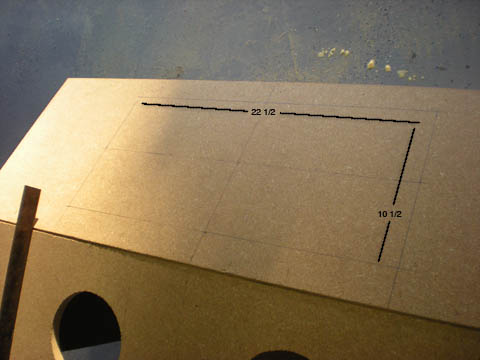
Step 8. Here I cut and centered the viewing window to the dimension shown above. These are specific to fit my 12" x 24" piece of Lexan that I plan on using.
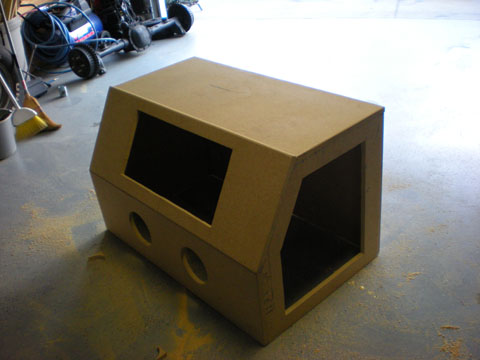
Here is the box with almost all the hole cut. I still have a light to install, vents and a hole for my shop vac. I used a plane to smooth out all the sharp edges on the corners. I'll give it a good sanding just before I paint it.
Step 9. These are the dimensions you'll need for the actual door. I smoothed the sharp corners of this piece also with a plane.
Here is the light I chose from Home Depot. I cost about $ 12.00
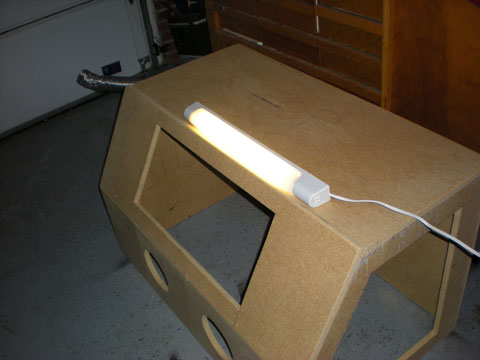
Here it is turned on, my guess is it will be plenty bright enough to light the inside of the box.
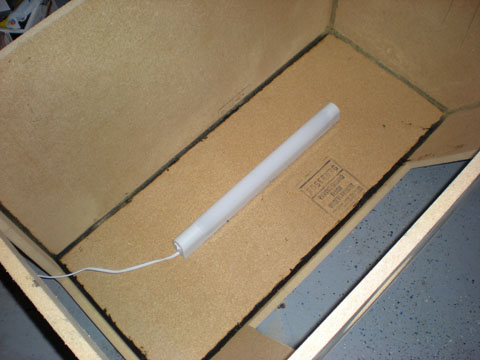
Step 10. Mount the light inside of the box.
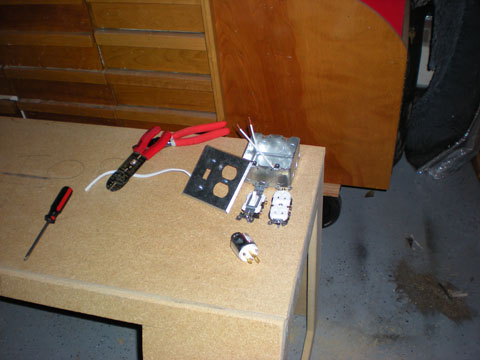
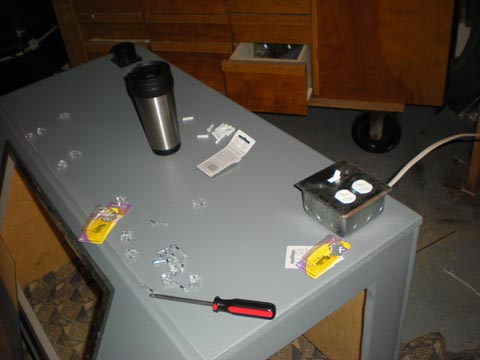
Step 11. I drilled a 3/4 " hole in the top right hand corner. Here is the electrical stuff I got... a switch, an outlet, a three prong plug, utility box and cover. That along with the sheet of lexan was about $ 40.00. If you didn't notice, I cut off the end of the plug on the light to wire it directly to the switch.
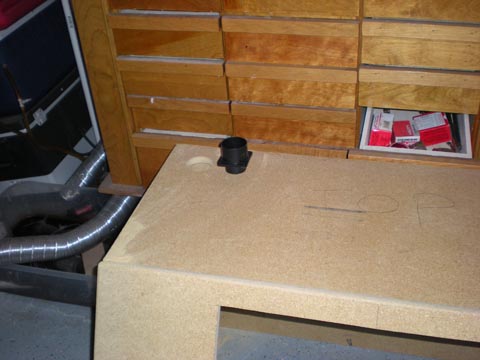
The last two holes I cut were for the vacuum and the vent. Shown here is the vacuum hole. I found this thing at Home Depot called a shop vac universal adapter thing. I drilled the same size hole on the back side on the opposite end for the vent. The hole size is immaterial to you because your adapter or vacuum hose may be a different size. If you look in that open drawer, you will see a myriad of different sizes, I just went through them until I found a good match. One important note, I opted to put the vacuum on the TOP! My plan is to sit my shop vac on top, this will help avoid bringing in large particles of junk to include my blast media due to good ol' gravity. If you put your shop vac below the hole you cut, you may end up bringing in too much junk and clogging your filter a lot sooner.
This picture shows several things,
1. It's Painted
2. Electrical work is done. Please don't ask how to wire it. If you do not know how to work with electricity then don't attempt it. Ask someone who does or an electrician.
3. Please notice the foam I used around the window opening. I bought 3/4" by 5/16". This size will work perfect and border the 10 1/2" by 22 1/2" hole.

Step 12. Install your glass or Plexiglass. I bought these 1/4" mirror holders at Home Depot. About $ 2.00 for a pack of 4 and I bought 3 packs for a total of 12 clips. I think these things are going to work perfect to hold the Lexan tight up against the foam insulation.
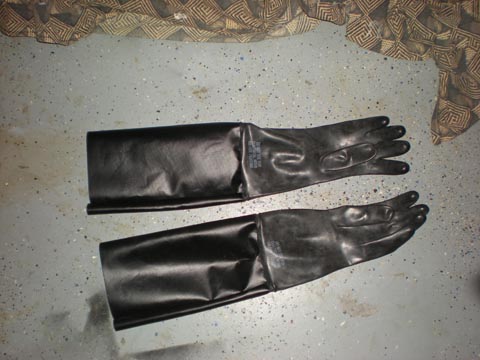
I want to take a second to show you my gloves. Total cost to me.... $ 0.00 The gloves are from my Chemical buddys in the Army. They have tons of them that they throw away after a *training* mission. They are 25 mils in thickness and should outlast my cabinet :)
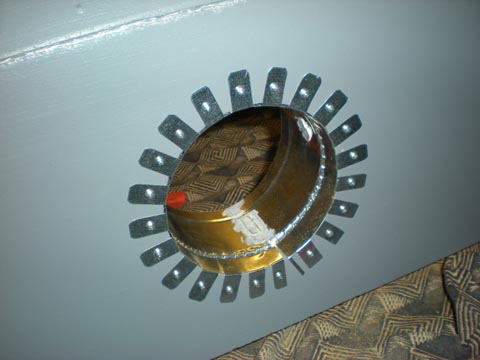
Step 13. Install flanges. Remember the $ 3.50 dryer vents I was trying to get to work. Well, all worked out pretty damn good. In addition to screwing each tab into the box, I caulked the inside for a real good seal.